Pull-ups Are Tough, But They Don’t Have To Be! Here Are Five Strategies To Make Pull-ups, Chin-ups And Their Many Variations A Little Bit Easier
Let’s face it. Pull-ups and chin-ups are tough. I don’t care who you are. They’re just a really challenging exercise – period.
And get this. Even though I’ve been doing pull-ups since I was eleven years old, they’ve never gotten any easier. But that doesn’t mean there aren’t some things we can do to make them a little easier. And the way I see it, the more you and I can do to put the odds in our favor, the better! So, in this short article, I’m going to give you five subtle ways to make pull-ups and chin-ups a little easier.
But before we get to the five tips, here’s a little hint…
Before you try anything else, simply try using a different grip. Some people are surprised to find out that although they can’t do any pull-ups, they can do a couple of chin-ups simply because a simple grip adjustment changes the musculature involved in the exercise. Also, many people find that using a neutral grip (ie hands on parallel bars, palms facing each other) tends to be a little easier than regular pull-ups, too. So, experiment with these three grips – my top 3 pull-up grips – and use the one which feels the best for you.
Hopefully, a simple grip adjustment will improve your performance right from the start. But regardless, you can also use these five strategies, too.
1) Using your body type as your guide, anchor yourself on the bar by gripping it not just properly, but optimally – The number one most reported tip or hack that has instantly helped my clients to do more pull-ups has to do with grip technique. So, don’t downplay it because it can make a big difference – for beginners and seasoned trainees alike. When doing pull-ups, your entire body is literally anchored to a bar. Your grip forms the foundation of your support. So, you’d better get this one right. And fortunately, it’s not that hard.
The most important points are that you have a neutral wrist (neither flexed or extended, but hanging straight down from the bar), that you wrap your thumb around the bar on the same side as your fingers, and that your hand placement is in line with your shoulder structure (ie the width of your hands on the bar). This last point is not only based on the width of your shoulders, but on your mobility and flexibility at the shoulder joint and surrounding areas. There are some simple diagnostic tests you can do to figure out the optimal hand placement for pull-ups here and chin-ups here (no PhD required!). And there’s more information on how to optimize your grip in my free Pull-up Training Crash Course (check pages 4 and 5 in my free guide 3 Easy Ways to Instantly Improve Your Pull-up and Chin-up Results).
2) Get your body into the right position (ie proper alignment) for maximum strength recruitment – when you’re preparing to deadlift a heavy barbell, your body alignment is critical to your success. And the heavier you go, the more important it becomes, especially when you start using near-max loads. Before you initiate the pull, you’ll need to get your spine aligned properly, your feet in just the right spot, your core nice and tight, and your knees, hips, and shoulders all lined up. Even the direction your eyes are looking will have an effect on your performance. Every little detail matters. Well, it’s the same thing with pull-ups.
So, when performing them, you’ll want to have your spine in a neutral position, tailbone slightly tucked forward, your shoulders should be packed down (ie stabilized on your torso), and your legs either straight (ie knees locked, toes pointed, quads squeezing) or bent, if necessary (ie knees bent, thighs squeezing), among other things. You can learn more about optimizing your pull-up technique with specific cues on body alignment in my detailed tutorial here: The Right Way To Do The Pull-up Exercise.
3) Give yourself a temporary strength boost by priming your muscles and joints with a pull-up specific warmup so that your body is practically humming before you get started – A warmup should not only raise your body temperature and help you loosen up, it should also increase your energy levels. And done properly, it’ll get you so ramped up that your body will be aching to perform.
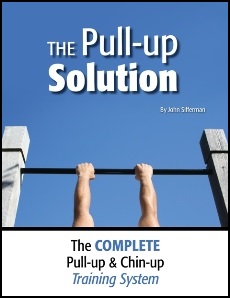
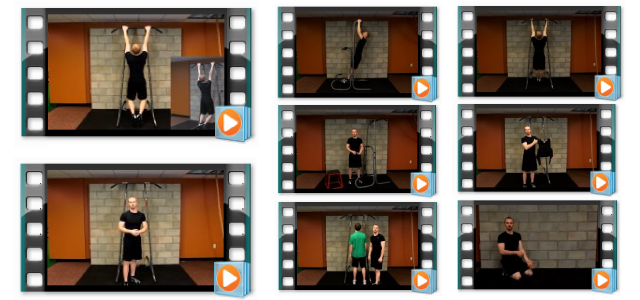
 Now, joint mobility exercises and other warmup routines have been shown to temporarily increase strength levels and can be used for this purpose prior to a workout. This is one of the reasons why my program The Pull-up Solution includes a targeted 5 minute joint mobility warmup to help prime the working joints and the surrounding musculature prior to pull-up training. And it’s also why one of my customers named Morgan told me, “Just did my first run-through after buying the system and I have to say that the warmup and cooldown routines are so good they’re almost worth the price of admission alone. Wow!” This stuff works.
So, before you do your first set of pull-ups – either as part of your normal warmup, or just quickly before your pull-up set – perform some basic joint mobility exercises smoothly and slowly for a few minutes or so. You can do basic arm circles, elbow ROM drills, wrist mobility exercises, and don’t forget your hands and fingers, too. Get your body a’movin’ and a’shakin’ so that it’s yearning to get going. You can find a free joint mobility routine that will teach you some great beginner-level exercises here. And there are also some basic muscle activation exercises for pull-up prep here.
4) Initiate the pull by exhaling forcefully and tightening your whole body so that you feel light as a feather (well, sortof) – Have you ever tried to lift someone who was completely relaxed? It’s pretty tough, and would be much easier if said relaxed person flexed most or all of their muscles and became more rigid. The saying goes, “tighter is lighter.” And it’s because you’ll feel much lighter if you tighten up your body.
So, when you’re performing your pull-ups, initiate the pull by exhaling forcefully through your mouth and contracting the corset of muscles surrounding your core. Think of squeezing the muscles that contract when you’re coughing. Your belly should compress inwards (ie, although, not “sucking in”). Your obliques should pull downwards. Your abs should crunch ever-so-slightly, but don’t break spinal alignment. Your glutes should squeeze powerfully, slightly tucking your tailbone forward. And your legs should be contracted, too – ideally, with knees locked and toes pointed. That’s a lot to think about, and if it’s all new to you, start by focusing on the exhale coinciding with a powerful core contraction. The rest will come with time and practice.
Note: you can learn more about turning the pull-up into a full body exercise through proper breathing and muscle activation in my special report 3 Easy Ways to Instantly Improve Your Pull-up and Chin-up Results.
5) Find your strength “sweet spot” by adjusting the exercise to your skill level in order to train right at your edge, and no further – If you’re using an exercise that is simply too hard for you, then progress is going to come very slowly, if at all. And the same is true if you’re using an exercise that’s too easy for you. And this will change with time and practice. So, the key is to find the sweet spot that will challenge you – in your current conditioning level – adequately, without being too hard or too easy.
So, if the pull-up exercise is way too hard for you, then you can use big adjustments like assisted pull-ups, negative repetitions, or by holding the flexed-arm hang or the deadhang position. Or, maybe you don’t need big adjustments, and you can simply use a slight assist or even a small kip to help you do your reps. There are many ways to do it, and you can click here for some of the most popular ones.
On the flip side, if you’re more advanced, then regular pull-ups might not be challenging enough for you. So, you’ll want to move on to more advanced versions (e.g. weighted pull-ups, one-arm pull-ups, etc.). Even if you’re technically using a harder exercise, the strength you build will make standard pull-ups that much easier – and you’ll not only notice it in the weeks and months ahead, but probably your very next set of normal pull-ups.
The key is finding the sweet spot so that you can train right at your edge, and no further, for optimal strength adaptations and development. If you can do that, then you’re in the zone.
Final Words
So, those are five subtle tips for making pull-ups a little easier. And when all else fails, lose some weight! And while you’re at it, make sure you BURN the fat and BUILD the muscle. Mmkay?
But all kidding aside, it doesn’t matter how old or young you are, if you’re fat or fit, weak or athletic. Anyone can get better at pull-ups. Anyone. It just takes time, patience, and work – lot’s of it.
And if you would like to practically guarantee that you’ll get better at pull-ups over the next few weeks and months, then check out The Pull-up Solution, which is on sale for the next three days. This will help you rapidly increase your pull-up numbers in three months or less using a unique twist on pull-up training. It’s my finest work for aspiring pull-up trainees, and it’s 25% off to celebrate Thanksgiving.
Click Here To Learn More About The Pull-up Solution*
*25% off until Wednesday, November 19th at midnight EST. Happy Thanksgiving!

If you found this article helpful, please share it with your friends:
.jpg)
![]()
Health-First Fitness Coach
P.S. If you liked this post, then please signup for the newsletter, or follow me on Facebook or Twitter for daily updates and other interesting info.

